As I mentioned few times I also use my blog to writes notes for myself, that perhaps can be usefull for someone else, but this is not the main purpose of these. This time I want to write a series of notes about 'toolchains' that I use to generate projects for my MUC development. Let's start with STM32 family.
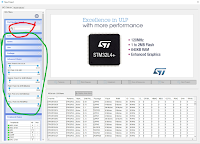
 For STM32 I prefer to use CubeMX with Keil v5 - I am fully aware that HAL libraries, provided by CubeMX are far from perfect, but for my taste (and needs) they are okay. So in order to start with the project we need to start a new project in CubeMX, and select our MCU. If we know exactly which device we want to use we just search for it (using the box marked in red); if we don't know which device to use, but have some defined needs we can search for a MCU that will meet them (using tools marked in green).
 |
| I/O configuration windows in CubeMX |
 |
| Project preferences in CubeMX |
After setting up all the preferences in CubeMX we can generate the project (Ctrl+Shift+G) and open the generated project. It will automatically open in Keil (if we have it installed of course). The project structure is fairly simple (although filled with various files and HAL drivers if you have configured as many peripherals in the system as I did.
Among all the files only several are of interest for us:
- main.c - pretty self-explanatory
- startup_stm32f103xb.s - ASM startup for the MCU for initalisation, configuring the clock systems etc. There is no user-editable code there, but I like to modify the stack and heap size there (it's easy and fast this way).
- stm32f1xx_it.c - Interrupt routines. All the functions here are defined by the CubeMX, but have user-editable code for handling the interrupts (at least most of them).
- usbd_cdc_if.c - Interrupt functions of the USB-CDC middleware (if you are using this peripheral). You have to put your code in the CDC_Receive_FS function.
Basically these are the files that need editing during the development. You can add your own files/libraries to the code, if needed. I, for example, prefer to add an header with all the global variables in the project (example below):
 #ifdef DEFINE_VARIABLES
 #define EXTERN /* nothing */
 #else
 #define EXTERN extern
 #endif /* DEFINE_VARIABLES */

 EXTERN char* USB_command;   // pointer to command
 EXTERN char* USB_parameter;  // pointer to command parameter
 EXTERN _Bool USB_new_command; // new command from USB to do

 EXTERN uint16_t start_frequency;
 EXTERN uint16_t frequency_increment;

 EXTERN uint32_t AD5933_clock; // In Hz

 EXTERN uint16_t DS1085_address;
 EXTERN uint16_t AD5933_address;

 EXTERN uint16_t* measurement_real;
 EXTERN uint16_t* measurement_imaginary;
 EXTERN uint16_t* frequency;
 EXTERN _Bool frequency_set;
 EXTERN _Bool measurement_sent;
Then you just include this header in all files, that need to have acces to the global variables. In just one of this files (no more no less!) you add:
#define DEFINE_VARIABLES
This way in all the files, except the one with the
#define shown above, all the variable definitions will be preceded by the extern keyword, so the linker will know what to do.After this you only have to configure the debugger/programmer in Keil. I use Seggers J-Link and program my STM32s over SWD so I have to set this in the project options:
And that's it. You have your project ready for further development.

Całkiem ciekawy blog!
OdpowiedzUsuńPozdrawiam,
Piotr